On this page you can find documentation about different functions of the booking system app. If you have any problems or questions please write to the support.
Embedding the booking website instead of using the link
By default, you can just send your clients the link that the booking app provides. You don’t need an own website. However, if you have a website and would like to embed the booking system website into it, this is possible, too. Just write e.g.
<div><iframe width="100%" height="700px" frameborder="0" src="https://www.calengoo.com/booking/yourcompany/"></iframe></div>
into the HTML code of your website and replace “yourcompany” with the correct name for your own booking website. Then it should look like this:
Converting slots to persons
Booking different persons
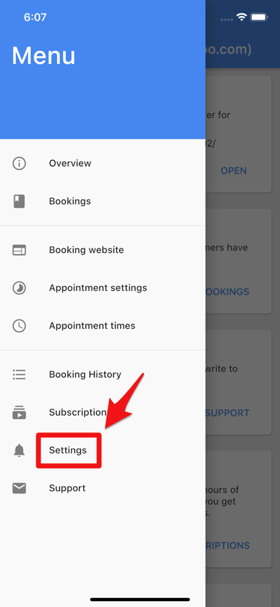
If your clients should be able to choose from different persons you can configure them in the “Settings” menu:

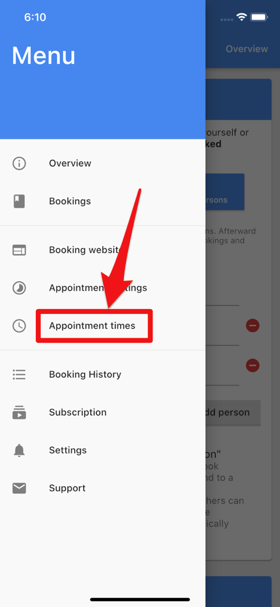
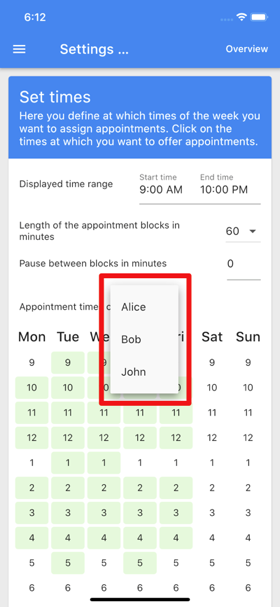
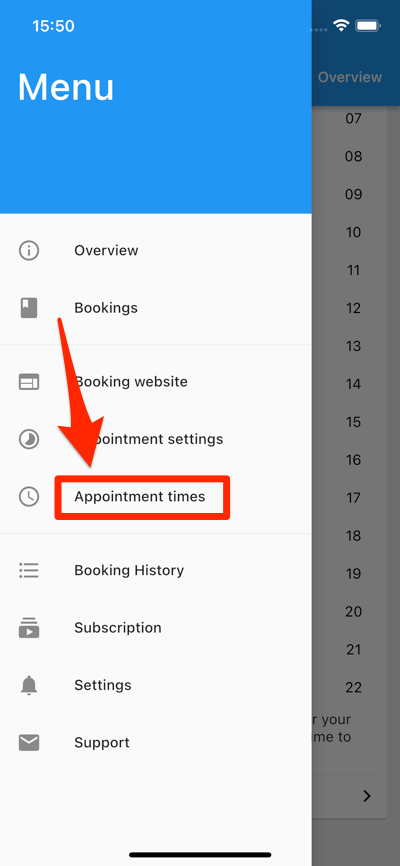
You can configure the appointment slots for each person separately in the “Appointment times” screen:
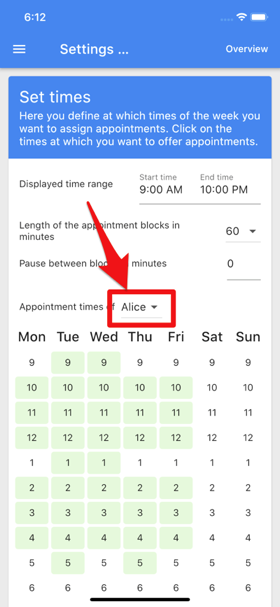
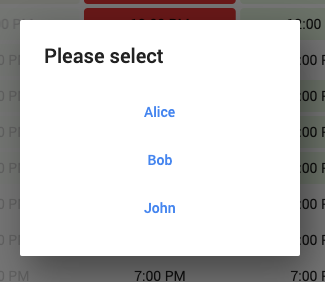
When your clients visit your booking website they can choose which person they would like to book. If “Allow booking of any person” is turned on (see the screenshots above) then “Any person” is selected by default, which means the available times of all persons will be displayed together. But if “Allow booking of any person” is turned off, they will have to select a person when opening the website:
Drag&drop to move/copy events
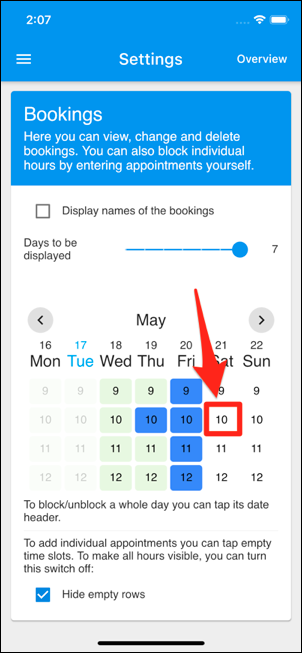
You can tap&hold a booking in the “Bookings” screen to move or copy it to a different day or time.
Offering different services
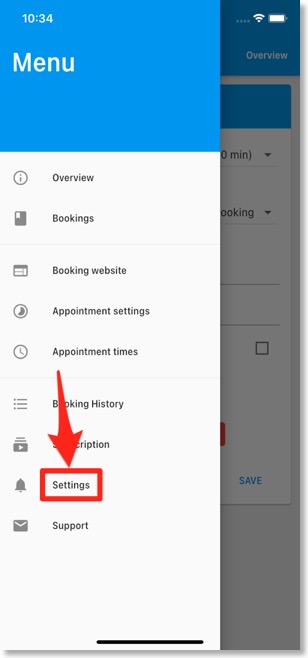
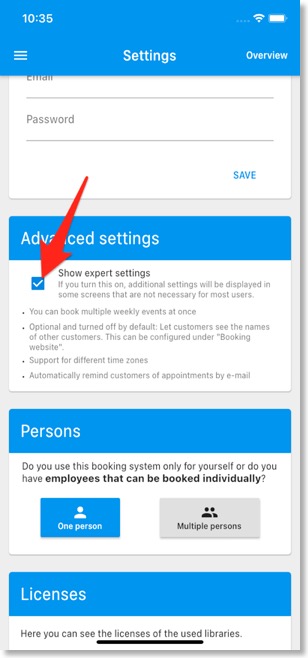
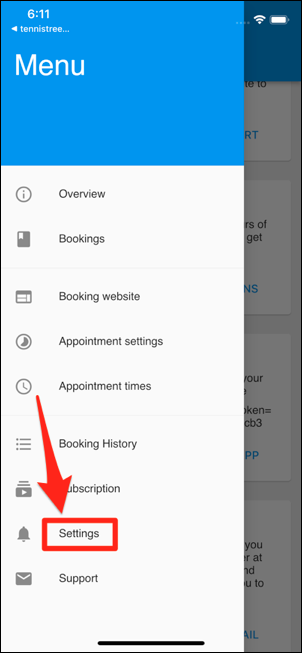
It is possible to let your clients choose between different services. First tap the menu button in the upper left corner, select “Settings” and turn “Show expert settings” on:
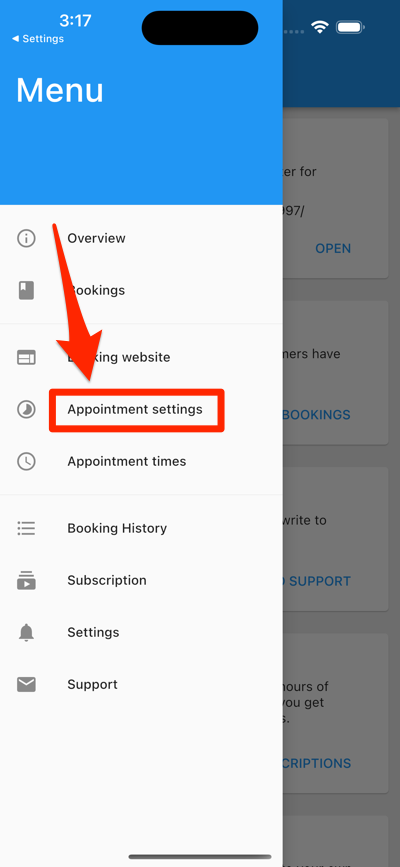
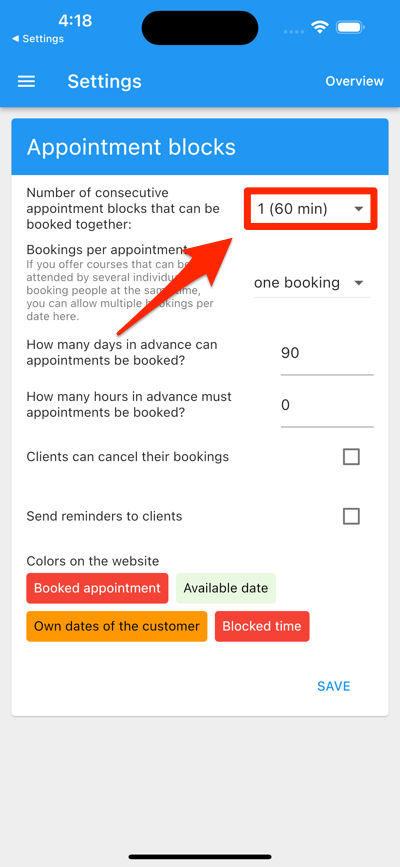
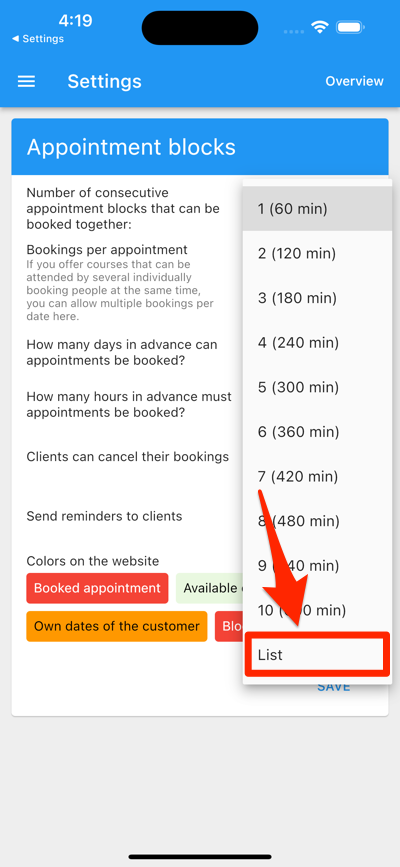
Then tap the menu button in the upper left corner again, select “Appointment settings” and set “Number of consecutive appointment blocks that can be booked together” to “List”:
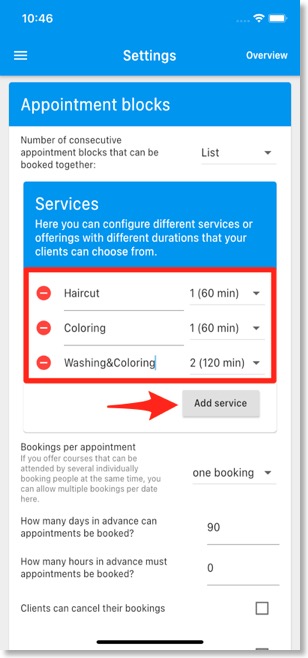
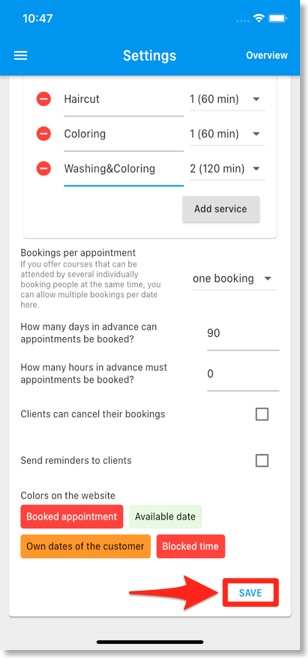
Afterward you can enter a list of services and tap “Save”:
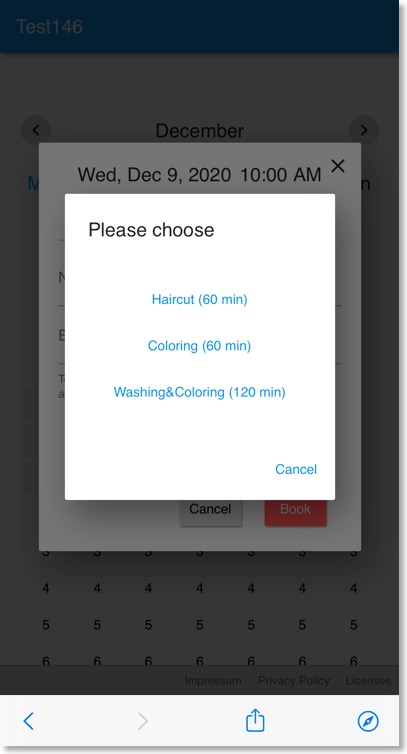
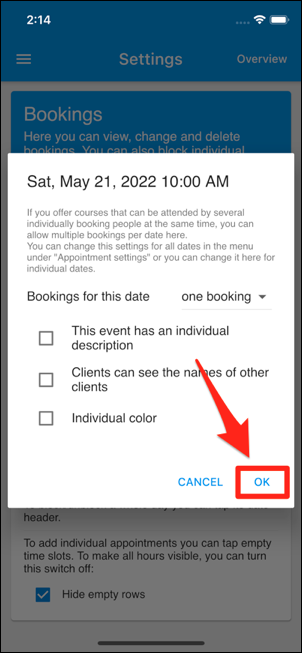
When your clients visit your booking website and select a time, they have to select one of these services before they can enter their data to book that time:
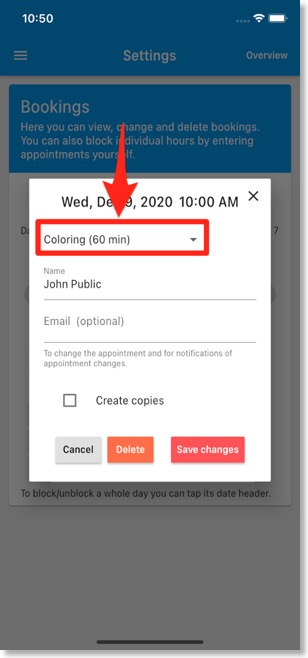
You can see in the app which service they have booked when you open the booking in the “Bookings” screen:
Exporting bookings
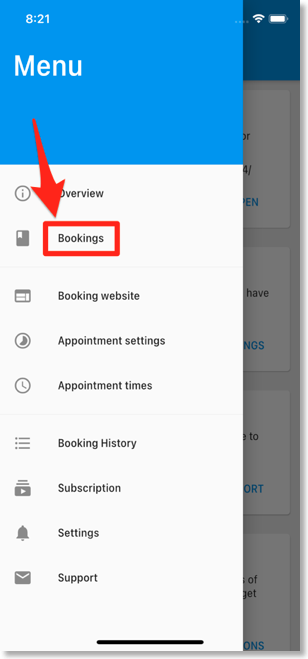
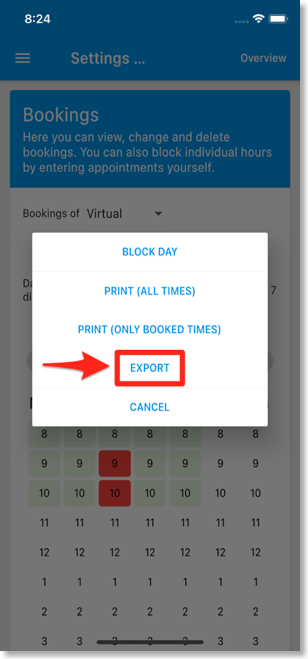
You can export the bookings as PDF, text, CSV or Excel files. Just tap the menu button in the upper left corner, select “Bookings” and tap the date header of a day. Then select “Export”:
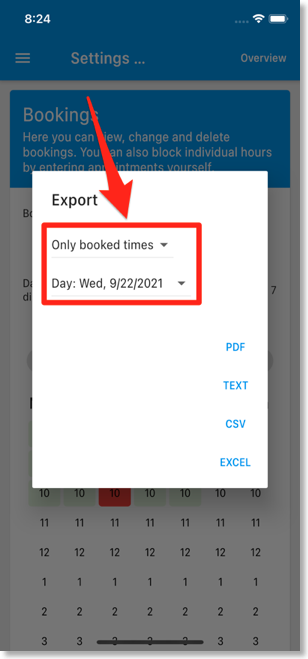
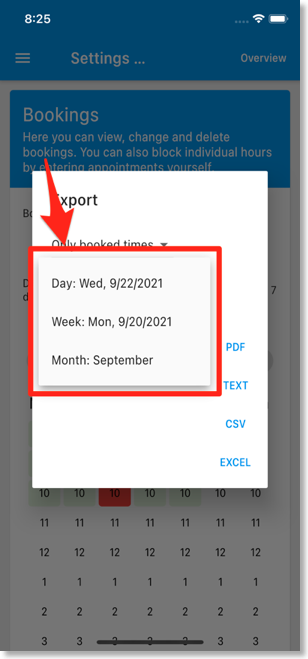
There you can select which time frame you would like to export and then you can tap one of the buttons to export the bookings in that format:

Individual booking slots
If you don’t want to offer the same slots every week or just want to offer additional booking times on a certain day, there are several options:
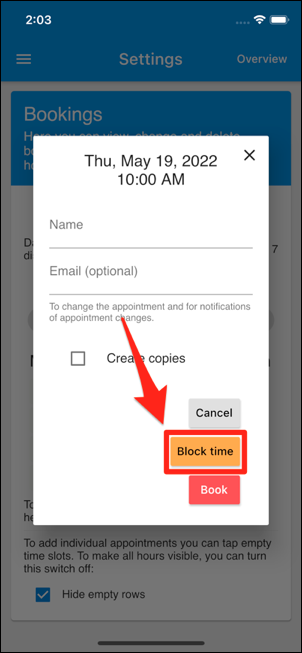
- To prevent a time from being booked, you can block it. Just open the slot in the “Bookings” screen and select “Block time”.
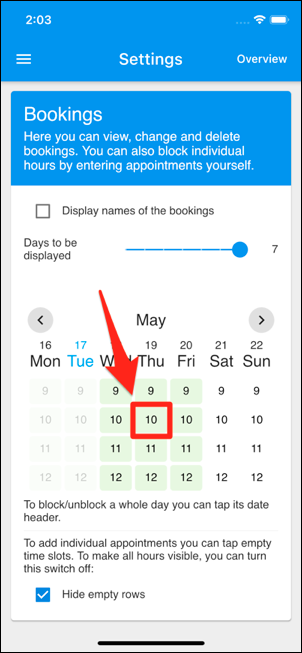
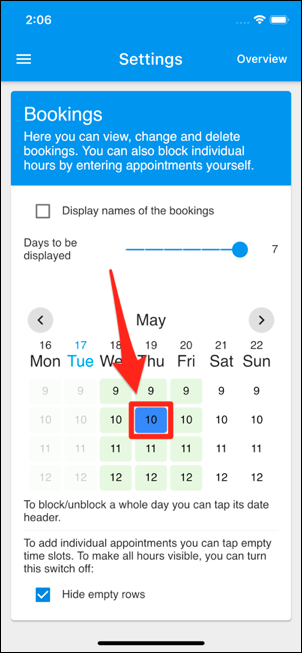
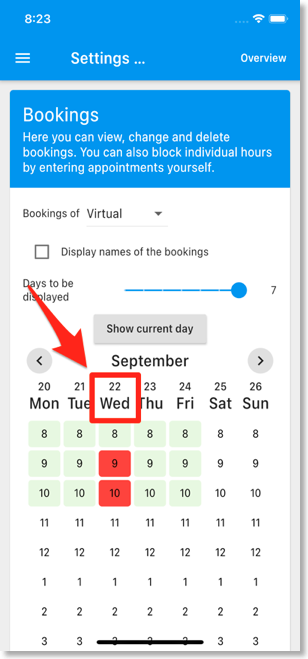
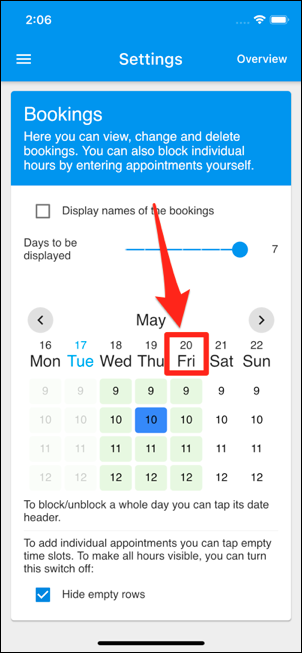
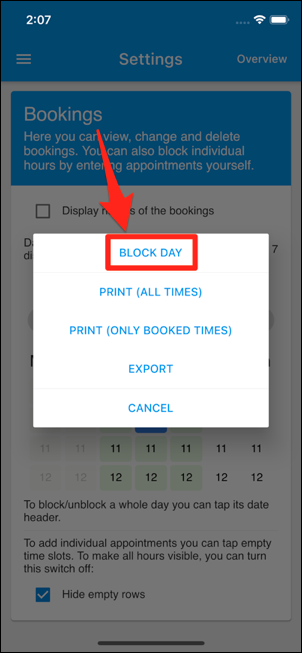
- If you are on holiday and want to block a whole day, just tap a date header in the “Bookings” screen and select “Block day”.

- To add a new bookable time not every week but just for a certain day, you can turn “Show expert settings” on in the “Settings” screen and then tap the time that you want to make bookable in the “Bookings” screen. There you can then select “Make this time bookable”.


Or you can open the “Appointment times” screen and select “Edit individual slots” at the end of the screen.
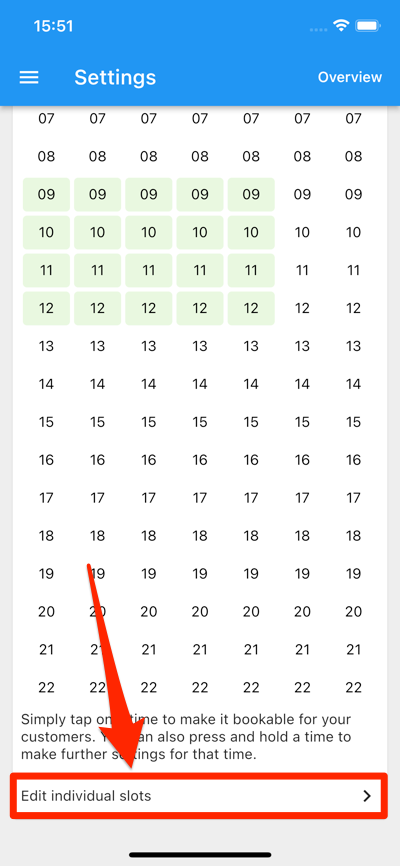
There you can also edit multiple slots at once by long pressing them:
