


Using icons in events
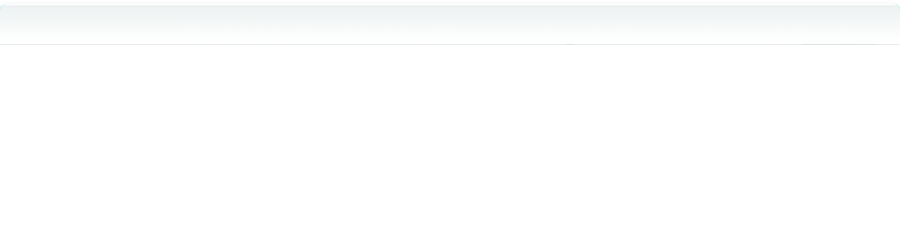
Google Calendar can save an icon into each event. In the past the Google Calendar website could also display these icons but now it cannot do that any more. However in CalenGoo (for Android, iOS, Windows and macOS) you can still use icons for events in directly synced Google calendarsIn CalenGoo you can enable this feature by turning “Settings”, “Icons”, “Show Icons” on. Afterward you should tap the “Download Google Icons” button to download the standard icons of the “Event flair” plugin. If you want even more icons you can tap “Settings”, “Icons”, “Download icon list”, enter “http://www.calengoo.com/icons/icons.txt” and tap “Done” to download 100 additional free icons (a subset of the FamFamFam Silk Icons).
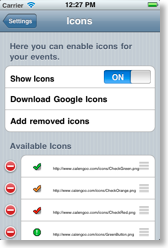
When “Show Icons” is enabled you should find a new “Icon” section at the end of the edit view. There you can choose the icon for the current event. This works only for directly synced Google calendars and for local calendars, but not for calendars that are synced with the iPhone’s calendar. The iPhone’s calendar does not support icons.
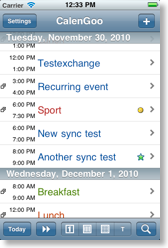
These icons are also displayed in Google Calendar even if the “Event flair” feature is not turned on:

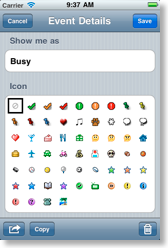
Special month view
There is an option “Settings”, “Display and Use”, “Expert”, “Month view”, “Only events with icons” to display only events with icons in the month view. It can be used to display e.g. only the most important events in the month view and get a quick overview: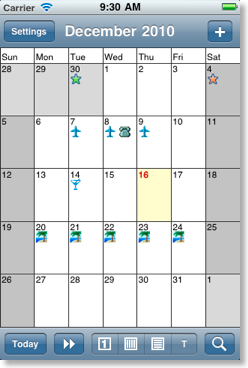
Adding own icons with Google Drive
Just open Google Drive ( https://drive.google.com ), create a new folder named "calengooicons" and copy your icons as 16x16 px PNG file or 32x32 px PNG files into that folder. Then open "Settings > Icons" in CalenGoo and tap "Download icons from Google Drive". CalenGoo will then automatically make all icons in the "calengooicons" folder public (so that the Google Calendar website can access and view them when you use them for your events) and will download them. Afterward you should see them in the "Settings > Icons" screen and when editing a Google event.Adding own icons (old method)
You can add own icons in the same way as the “famfamfam” icons above. But because Google Calendar needs to download them when displaying your calendar, they must be saved on a web server. To add your own icons just follow these steps:- Upload your icons (usually 16x16 px PNG files or e.g 32x32 for high res icons for the retina display) to a web server.
If you don’t have a web server, you can create a free Dropbox account and copy your files into the public folder of your Dropbox. Then right-click these files and choose “Dropbox”, “Copy public link” to get the address of this file. This address can either be used directly with “Settings”, “Icons”, “Download single icon” in Calengoo or you can create a list of icons (see steps 2-4). But you must not remove these files afterward from your public folder, because they will be loaded by Google Calendar every time you use the Google Calendar website and an event with that icon is displayed (i.e. it won’t save the icon, the Google Calendar website will download it again every time it needs it).Dropbox does not support public folders any more. Instead you can use Google Drive. A function to automatically copy existing icons from Dropbox to Google Drive and changing the affected events has already been added to the beta version of CalenGoo. Please tell me if you need it.
When using Dropbox you have to ensure that the link points directly to the file, not to a Dropbox webpage that just shows the file. The "Copy public link" function should already create the correct link. Direct links in Dropbox usually start with "https://dl.dropbox.com" and not with "https://www.dropbox.com".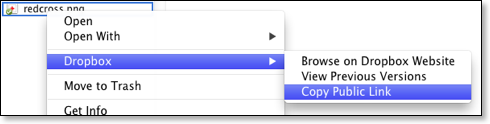
Upload the files to https://drive.google.com and get public links of these files by right clicking them and choosing "Select shareable link":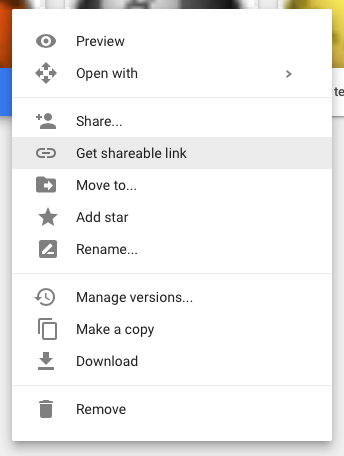
Then open the link that you get. It won’t point directly to the file but to a web page that contains the file. However we need a direct link to the file. To get this click on the download link in the upper right corner and download the file: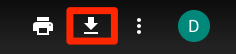
Afterward open the downloaded files list in your browser and get the link of the downloaded file: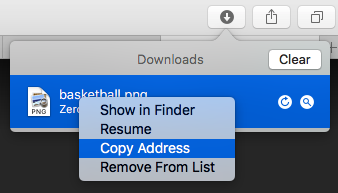
This is the link that you need, a direct link to the file.
An easier method to do this automatically will probably be offered soon. - Create a text file that contains the URLs of all your icons, one per line:
http://www.calengoo.com/icons/redcross.png
http://www.calengoo.com/icons/silk/attach.png
If you sync via OAuth2, the icons must be accessible via https, otherwise they cannot be displayed in Google Calendar. - Upload this text file to your web server, too.
- Tap “Settings”, “Icons”, “Download icon list”, enter the URL of your text file and tap “Done”. CalenGoo will now download all icons referenced in the text file.