


Configuration
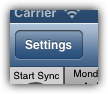
CalenGoo has a lot of configuration options that you can find under the "Settings" button in the upper left corner and there especially under "Display and Use". You can find a list of all configuration options with a short explanation below.
Colors for events
To use different colors for your events you can use different categories/calendars (which is the recommended way, because it has some advantages) or Google's event colors. Events are usually displayed using the color of the calendar they belong to. To change the color of such a calendar just tap the blue button behind the calendar's name under "Settings", "Visibility/Download".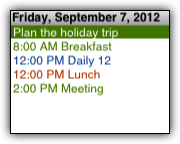
All-day events
All-day events are displayed with text on a colored background. The color of the background bar is the color of the calendar the event belongs to. The font color is white by default, but you can change it. You can change it separately for all views under"Settings", "Display and Use", "Expert", "Day view", "Title"
"Settings", "Display and Use", "Expert", "Month view", "Font color"
"Settings", "Display and Use", "Advanced", "Week view", "Font color"
"Settings", "Display and Use", "All", "Landscape day view (week)", "Font color"
Or, if you are syncing via OAuth2, you can turn "Settings", "Display and Use", "All", "Expert/Maintenance" (at the end of the list), "Use OAuth2 font colors" on. Then CalenGoo will use the font color which is specified by Google Calendar for each calendar color (which is black for most calendar colors).
Normally you do not need to configure CalenGoo, you only need to enter your Google Calendar's username and password and can start to use it.
But if you think something should be displayed in another way or if you would like it to behave differently, you can find a lot of configuration options. The following list explains these configuration options. You can find these options by pressing the "Settings" button in the upper left corner.
Calendar
Display
Synchronization
New event's reminders
Information
Maintenance
Tasks
In Google Calendar you can turn a small, simple task list on by clicking the "Tasks" link on the left. Tasks that are entered with a due date appear on this day in the calendar and can be marked as completed.
Icons
You can assign icons to events if you like. To do so you have to turn "Show Icons" on and tap "Download Google Icons" once to download Google's icons. Please see here how to enable the icons in Google Calendar: Icons
There is a list of icons under "Available Icons". These are the icons that you can choose from when editing events in CalenGoo. If you like you can reorder them or delete some. If you deleted some that you did not intend to delete, you can get them back with the "Add removed icons" button.
Below the list there are two functions for experts: "Download icon list" and "Download single icon". They can be used to import your own icons. These icons will be usable in CalenGoo and they will be visible in CalenGoo and Google Calendar.
To add an icon you have to save it as 16x16px PNG image and upload it to a webserver. Then enter its URL under "Download single icon". If it works, the new icon is added to the end of the "Available Icons" list. It is necessary to leave the icon on the webserver because Google Calendar will download it from there every time you view your event. The event knows only the URL of the icon, the icon itself is not saved in the event.
If you have a collection of icons and would like to add them all at once you can use "Download icon list". You need to upload your icons somewhere on a webserver. Then you have to create a text file that contains one URL per row, each pointing to another icon (16x16px PNG).
You can find more information about using icons in CalenGoo on this page: Icons
Display and Use
When pressing the "Display and Use" button, you get to a long list with further configuration options. These options can be filtered by the buttons at the top of the screen: "Basic", "Advanced", "Expert", "All". In the "Basic" mode you will only see the most important settings, in the "All" mode you will see all settings.
General
Edit view
Day view
Month view
Landscape day view (week)
Year view
Search view
Tasks view
Expert/Maintenance
You should normally not need these functions. They are only here for debugging purposes.
But if you think something should be displayed in another way or if you would like it to behave differently, you can find a lot of configuration options. The following list explains these configuration options. You can find these options by pressing the "Settings" button in the upper left corner.
Calendar
- Visibility/Download:
Shows your calendars in your Google Calendar account and allows you to specify for each of them if it should be visible and downloaded. Scroll down the calendar list to get a legend describing the different options.
If you tap the blue arrow button behind a calendar's name, you can change the color of this calendar (in CalenGoo) and add reminders that are used for all events in this calendar in addition to the reminders of the event itself. This can be useful e.g. for birthday calendars that are not editable and where you normally cannot add reminders to the events. - Reminders:
Here you can configure if you would like to get notifications on your iPhone/iPod for "Pop-up" reminders. You can also specify different kinds of sounds for events of different calendars. The Mute event reminders during events function removes the sound from all event reminders that occur during another event. So they won't disturb you during another appointment. "Repeat alarm every minute" repeats the alarm every minute until you stop it. Due to some changes that Apple made in iOS 10 and later this didn’t work well on some devices any more. For this purpose a new experimental "Repeat with remote push" option has been added that uses a server that sends push notifications to your device. if "Snooze function" is turned on you can snooze reminders. If "Task reminders" is turned on you can add reminders to tasks. If "Alarms for iOS reminders" is turned on then CalenGoo will display notifications for iOS reminders. But then you might get duplicate notifications of the iOS "Reminders" app also displays such notifications. "Use Google’s default reminders" determines if your new events should include the default reminders that you have configured in Google Calendar. "Display pop-up also for SMS reminders" means that CalenGoo will display notifications if your events have "SMS" reminders. The "Show all default reminders" screen helps you to see which default reminders you have configured. - Tasks:
Allows you to configure the task functions, please see below. - Badge on app's icon:
It is possible to display a number on a red badge on the app's icon. Here you can configure what should be indicated by this number, e.g. the number of remaining events for the current day, the unfinished tasks or today's date. You can also specify which calendars should be taken into account. "Count running event" determines if the number decreases at the beginning of an event or at the end. - Icons:
You can turn a feature on to add icons to events in CalenGoo and in Google Calendar (in the English version of Google Calendar by clicking the green flask at the top and enabling "Event flair"). - Autom. login:
When turned on, you do not have to tap the "Login" button in the login view to get to the calendar view. - Show login:
As an addition to "Autom. login" this, when turned on, hides the login view at all, you start directly in the calendar view.
Display
- Display and Use:
Offers a lot of configuration options, these will be explained in detail later on this page. - Print:
Here you can print the day, week, month, agenda and tasks view or email it as a PDF file.
Synchronization
- Autom. sync.:
When this is turned on, CalenGoo tries to synchronize your calendars every time it is started. This can make it slow while the synchronization is running. You can choose to turn the automatic synchronization off and start it manually, either with "Sync. now" in this "Settings" menu or by pressing the "Start Sync" button in the upper left corner of the day view. - Show sync window:
When turned on a blue sync status window is displayed when the synchronization is running. - Sync. now:
Starts the synchronization process. You can follow its progress by looking at the pie chart in the upper left corner of the day view. It will download all changes found in your Google Calendar account and upload all changes you have made in CalenGoo. - Accounts (only available if not syncing via OAuth2):
Here you can enter additional Google accounts if you would like to sync CalenGoo with multiple accounts.
New event's reminders
- Add another reminder...:
You can specify here which default reminders will be added to all events created with CalenGoo (e.g. SMS, Email, Pop-Up).
Information
- Time zones:
Sometimes users have the problem that their events are saved with a time offset, e.g. they save an event for 5pm, but in Google Calendar it appears at 6pm. The reason is a wrong time zone in one of their calendars in Google Calendar (see also the Support page). This menu shows all your calendar with their time zones and helps you to find the problem.
Maintenance
- Always retry upload:
Retries to upload erroneous events instead of ignoring them. - Retry erroneous upload:
Removes the erroneous-mark from all events meaning CalenGoo will try to upload them again. Erroneous events can be easily recognized by a dashed red border around them in the day view. It means that this event was changed but the change could not be uploaded because Google sent an error code. This should normally never happen. - Reset settings:
Sets all settings back to their factory defaults. - Reset calendars:
This will erase all calendars and events from the local database and download them again by running the synchronization. It can be useful if somehow the events CalenGoo displays differ from the ones you can see in Google Calendar. - Debug Tools:
Contains some tools to analyze problems:
Calendars: Allows you to examine and re-download single calendars.
Changes to upload: Shows which events contain changes that were not yet uploaded.
Debug Sync: Runs the synchronization and displays which events were downloaded. Useful when the sync takes quite long and you would like to examine the reason. - Export settings:
Allows you to backup CalenGoo's settings. Please see here for details: Export settings
Tasks
In Google Calendar you can turn a small, simple task list on by clicking the "Tasks" link on the left. Tasks that are entered with a due date appear on this day in the calendar and can be marked as completed.
- These functions can also be used in CalenGoo if you turn the "Sync Tasks" switch on.
- Color:
You can choose a color that is used to display your tasks in the calendar views. - Google Apps for Domains:
If you do not have a normal Google account but a "Google Apps for Domains" account, you have to turn this switch on. - Use login credentials:
If turned on, it will use the username and password that you entered in CalenGoo to log in to your Google Calendar account. If you would like to use the tasks from a different account or if you use "AuthSub Login" to login, you can turn this switch off and enter your username and password below. - Web instead sync:
Google does not yet offer an official access method for their Google Tasks service. The method CalenGoo uses works currently but it can break at any time. So if the sync sometimes stops working, you can turn "Web instead sync" on to get Google Tasks's website displayed instead of CalenGoo's own task list. This way you can still manage your tasks from within CalenGoo, but you won't see your tasks in the different calendar views and it works only when you are online.
Icons
You can assign icons to events if you like. To do so you have to turn "Show Icons" on and tap "Download Google Icons" once to download Google's icons. Please see here how to enable the icons in Google Calendar: Icons
There is a list of icons under "Available Icons". These are the icons that you can choose from when editing events in CalenGoo. If you like you can reorder them or delete some. If you deleted some that you did not intend to delete, you can get them back with the "Add removed icons" button.
Below the list there are two functions for experts: "Download icon list" and "Download single icon". They can be used to import your own icons. These icons will be usable in CalenGoo and they will be visible in CalenGoo and Google Calendar.
To add an icon you have to save it as 16x16px PNG image and upload it to a webserver. Then enter its URL under "Download single icon". If it works, the new icon is added to the end of the "Available Icons" list. It is necessary to leave the icon on the webserver because Google Calendar will download it from there every time you view your event. The event knows only the URL of the icon, the icon itself is not saved in the event.
If you have a collection of icons and would like to add them all at once you can use "Download icon list". You need to upload your icons somewhere on a webserver. Then you have to create a text file that contains one URL per row, each pointing to another icon (16x16px PNG).
You can find more information about using icons in CalenGoo on this page: Icons
Display and Use
When pressing the "Display and Use" button, you get to a long list with further configuration options. These options can be filtered by the buttons at the top of the screen: "Basic", "Advanced", "Expert", "All". In the "Basic" mode you will only see the most important settings, in the "All" mode you will see all settings.
General
- View before editing:
When you tap an event to open it and this feature is turned on, you will come to an overview screen, showing you all details of the selected event. From there you can tap the "Edit" button to get to the edit view. If it is turned off, you will come directly to the edit view. - View after start:
Here you can configure which view (day, week, month, agenda) should be visible right after the start of CalenGoo). - Show today after start:
If it is turned on, CalenGoo will jump to the current day on startup, otherwise it will keep displaying the date where you left (needs iOS4 to work). - Landscape mode:
Here you can turn off the automatic switching to landscape mode when the device is rotated. - Login Offline Button:
Adds a new button to the login screen labeled "Offline". When pressed, it starts CalenGoo in offline mode. - Ignore iPhone time zone:
Normally the iPhone's/iPod's time zone setting is taken into account when the times for the events are calculated. It may lead to problems and confusion when the iPhone/iPod does not have the same time zone as your first, your personal, calendar. When you enable this switch it will use the time zone of your first, your personal, calendar in your Google Calendar account. - Use fixed time zone:
Here you can configure which time zone should be used if "Ignore iPhone time zone" is turned on. Either the time zone of the first Google calendar ("Google") or a specific time zone. - Red line ignores times zone:
A red line in the day view marks the current time. This setting controls if it should take your current time zone into account (relative to your calendar's time zone) or if it should just display the current time. - Color/Width of 'Red line':
Here you can configure the appearance of the line that marks the current time. - Proprietary colors:
Some users e.g. that sync their Google Calendar with Outlook sometimes do not want to use more than one calendar. But they still would like to have different colors for different events. This is not possible in Google Calendar. By turning on this option, you can choose individual colors for all events that are saved in the description field of the events and are used in all views of CalenGoo. If possible you should not use this function and instead create one calendar in your Google Calendar account for every color you want to have. - Upload w/o download:
Normally CalenGoo tries to upload new and changed events immediately. When you turn this feature off, it will upload these changes only during the synchronization. - Upload before download:
Turn this on if you would like to have your local changes to be uploaded before changes from Google Calendar are downloaded. This way your local changes will have priority over changes made in Google Calendar. - Use SSL for data:
Here you can disable the encryption/SSL protocol that is used to access Google Calendar. - Shake to sync:
If turned on, the sync will start when you shake the device while the any of the calendar views is displayed. - Sync button to the left of the [+] button (only iPhone/iPod touch):
Displays a sync button in the upper right corner of the screen in all calendar views. - Sync on exit:
(Requires iOS4 and multitasking): If turned on, the sync will be automatically started every time you exit the app. You should also set "Min. time between auto syncs" to a reasonable time, e.g. at least 5 minutes to prevent it from starting the sync when you are just switching between different apps quickly after another. The sync will run in the background (up to 10 minutes) so you don't have to wait for it. - Min. time between auto syncs:
Skips the automatic sync on startup if the last sync was less ago than the time configured here. - Force password check:
This will force you to enter your correct password every time you start the app even in offline mode. It also means, the login screen will be displayed every time you start the app. - Local calendars:
This will allow you to have local calendars, i.e. calendars that are not synced with Google. Local calendars have several disadvantages, e.g. you cannot edit them from the web, you do not have a backup of your data in Google Calendar and currently you cannot have any reminders for events in local calendars. - Use cache:
When you have a really large calendar, start CalenGoo with the day view and the start takes longer than six seconds, you can try this feature to reduce the startup time. After turning on this feature you have to run the sync to initialize the cache. Normally you should not turn it on. - ISO week numbers:
CalenGoo normally displays the week numbers that are used in your country (see "How are the week numbers calculated?" on the support page). By turning on this function you will get ISO week numbers instead. - Show hints:
In some places of the application you will find blue "?" buttons in the upper right corner of the screen. When you tap them they will vanish and display a hint for the current screen. They will not appear again after they were tapped once. With this option you can completely turn them off. - Show age of yearly events:
If you have yearly events like birthdays, CalenGoo can compute the age of these events and display it behind the title, e.g. "John Public (30)". However this will only work if the event starts in the correct year. - All-day reminders:
When you have all day events with "popup" reminders, you probably don't want to be reminded at 12am in the night. So here you can specify at which time you would like to be reminded for all-day events. This will be the base time so if you specify another offset than 0 minutes for your reminder, e.g. 10 minutes, then you will be reminded 10 minutes before the time that you specified here. - Reminders with location:
Appends the location of the event to the title when displaying a reminder, e.g. "Meeting @Office". - Reminders with description:
Appends the description of the event to the message displayed in the reminder pop-up. - Reminders open detail view of event:
Specifies if the detail view should be openend when a reminder is selected or only the calendar view. - Overnight only 1st day:
If an event reaches into the next day, it will normally be displayed as two events, one from the start of the event to the end of the day and another from the start of the next day to the end of the event. By turning this on, only the first part, the event until the end of the day, will be displayed. - Events >24h as bar:
Displays events that have a duration of over 24 hours as a bar like all-day events (similar to Google Calendar). - Tasks-Clear deletes tasks:
The "Clear" button in the tasks view normally moves the completed tasks to the "completed" list (you can see this list in Google Tasks/Google Calendar). If you would like to delete them instead, you can turn it on here. - Header & Footer:
Here you can change the color of the title bar and the tool bar. - Header & Footer custom color:
If you selected "Custom Color" under "Header & Footer", you can specify the custom color here. - Weekend days:
Here you can specify which days should be marked as weekend, either because you normally work on weekends or because you live in a country that has other weekends. - Show iPhone/iPad/iPod calendars:
When turned on, you will be able to see and edit events from the iPhone/iPod calendar in CalenGoo. You can turn single calendars on or off under "Settings", "Visibility/Download". However turning this function on can slow CalenGoo down. - Sync iPhone/iPad/iPod calendars on startup:
If turned on, a sync of the iPhone/iPod/iPad calendar is triggered each time CalenGoo is started (similar to Apple's calendar app). - Free memory on exit:
This switch is turned on by default. CalenGoo uses a memory cache to save days of the calendar that were already loaded to increase the speed if the same day has to be displayed again. This consumes memory. When using multitasking under iOS4, apps should release as much memory as possible when they are backgrounded. So if "Free memory on exit" is turned on, CalenGoo will release this cache when it is backgrounded/exited. But this also means that it has to load the days again when it is started again. This will make CalenGoo a little slower when it is started again. - Snooze option 1-4:
Here you can configure the different options how many minutes a snoozed event can be moved. - Enable drag&drop:
Specifies if drag&drop should be supported. - Confirm drag&drop deletion:
Shows a confirmation dialog when you try to delete an event using drag&drop to prevent the events from being deleted accidentally. - Drag&drop moves always (no copy option):
If turned on, the "Copy/Move/Cancel" menu won't be displayed at the end of a drag&drop operation and instead the event will be moved. - Drag&drop clipboard/templates:
Adds a new "Clipboard" and "Templates" option to the Drag&Drop menu, please see here: Copying events and here Templates - Confirm 'Repeating event stopped':
Normally CalenGoo will display a message like "The repeating alarm has been stopped" when a repeating alarm has been stopped. But that means you have to confirm this message. To save this unnecessary tap, you can turn this confirmation off here. - Hide declined events:
If this is turned on, events where you are an attendee and have declined the event, are no longer displayed. - Hide declined events in shared calendars:
Hides events that you have declined also from shared calendars (i.e. copies of the event of other persons who migt not have declined the event). - Show birthdays of contacts, Show age for birthdays and Show year of birth:
Functions to display the birthdays of your contacts, please see here: Birthdays - Auto tap 'Today' every x minutes, Auto tap 'Today' interval and Auto sync interval:
Functions to use CalenGoo in a wall or desk installation, please see here: Wall/desk installation - Show end time of 0 min events:
To save some space you can omit the end time for events that have no duration. - Show calendar selection bar:
Displays a bar with buttons for calendars at the bottom of the screen. By tapping these buttons you can quickly view/hide the selected calendar. By long pressing a calendar only that single calendar is displayed. - Calendars for selection bar:
Here you can specify which calendars should be included in the calendar selection bar (see above). - Unselected calendar background:
The color that an unselected calendar has in the calendar selection bar. - Visible account background:
The color of a visible account in the calendar selection bar if the bar is used to turn whole accounts on and off. - Save state of calendar bar:
Specifies if it should be saved which calendars are visible and invisible so that the same calendars are visible and invisible if CalenGoo or the whole device is restarted. - Enable 'Floating events':
Activates the "Floating event" switch in the edit view to mark events as "floating". Please see Floating Events. - Move 'Floating events':
Determines if this device should move the events to the next day if they are overdue. Can be useful if you sync multiple CalenGoo instances with the same Google account. However usually it just works, even if this option is turned on on all devices. - Allow to mark events as completed:
If this is turned on, all events can be marked as completed (by checking a box). Completed events are displayed crossed out. Please see Completable Events. - Checkbox to complete events in agenda view:
Displays a checkbox for floating events (or for all events if "Allow to mark events as completed" is turned on) i the agenda view to easily mark them as completed. - Hide completed events:
If this is turned on, completed events are not displayed at all (instead of displaying them crossed out).
- Phone numbers:
When turned on, phone numbers in the event's description (not the title) will be recognized and highlighted (on iPhone OS 3.0 or newer). Then you can call them directly from the event's detail view. As a side effect it also enabled copy&paste (or at least "copy") functionality for the description field in the event's detail view. - Phone numbers in title:
Similar to "Phone numbers" but allows you to call phone numbers that have been entered into the event's title. - Editable title/description:
If this is turned on, a small blue button will be displayed to the right of the title/description in the edit view. By tapping that button you can directly edit that field from the detail view. - Link only exact name:
When you use the function to insert a contact's data into an event and a link to the contact is created in the description field of that event, it will look like "[Linked name:Firstname Lastname]". When this switch here is turned on, it will only show persons that match exactly the linked name in the detail view. When it is turned off, it will also display persons with similar names. In this case you can even use wildcards to link persons, e.g. "[Linked name:F*]" will link all persons who's name starts with the letter "F". By default this option is turned on. - Move event button:
When turned on, a button labeled "Move" will be in the tool bar of the detail view. It will allow you to move events to another date with just a few clicks without entering the edit mode. - Google button:
Adds a button to open the Google Calendar website for this event. Does not work very well because Google doesn't offer an iPhone-specific webpage for this purpose. - Show organizer:
Displays the organizer of events (otherwise only attendees are displayed). - Show account of calendar:
If you sync with multiple accounts, it will display the account a calendar belongs to in the calendar row of the detail view. - Open with Skobbler:
If Skobbler is installed and you tap the location of an event, you can use Skobbler to navigate to that location. - Open with TomTom:
Because CalenGoo cannot detect if TomTom is installed on your device, you have to turn this option on if you would like to navigate to an event's location using TomTom. - Open with Navigon: This option is only available if Navigon is installed on your device. Please see here for further details: Navigon integration
- Prev/Next event button:
Adds new buttons to the toolbar at the bottom of the detail view to quickly jump to the previous or next event of the day. - Delete button:
Determines if a button to delete the event should be displayed in the toolbar at the bottom of the detail view. - Templates button:
This will show a small button at the bottom of the screen to access the templates function. - Import contact button:
If you have an event that contains an address in the location field and the name of a person in the title, you can import this address into your local address book when this button is turned on. However it will only be displayed if the title matches the "Import contact prefix": - Import contact prefix:
Here you can enter a "regular expression" to determine if the event contains a contact and the "Import contact button" should be displayed. E.g. to display this button for all events that start with "Contact:" just enter "^Contact:" here. - Time/Title/Location/Calendar/Reminder/Recurrence font:
Allows you to customize the font used in the detail view.
Edit view
- New event's duration:
Here you can specify how long a new event should be initially. The default is one hour. - Default calendar:
When creating new events, they will be created in the calendar selected here as default (but you can change it in the edit view for every created calendar, is just specifies the default). - 2nd save button:
Activates another "Save" button in the "Title" and "Description" edit views in the upper right corner. It may be helpful for right-handers to save the text when using the iPhone with one hand. - Minute precision:
Here you can specify if you want to edit times in 1, 5 or 15 minute steps. - Auto open title:
When turned on, the view automatically switches to the title editor when you create a new event. - Swap cancel/save button:
Normally the cancel button is on the left and the save button is on the right. Here you can swap these buttons if you like. - New events always all day:
When turned on, all newly created events will be all day events. - New events for current time:
When turned on, all new events that are created using the "+" button (not those created by a double tap) have the current time (rounded to the next hour) as start time. - Guest notifications by default:
Specifies if the "Send invitations" switch should be turned on or off by default when creating events with attendees. - Guest notifications for drag&drop:
When you move an event via drag&drop and this switch is turned on, the attendees will be informed by email that the time of the event has changed. - Guests can modify by default:
Specified the default for the "Guests can modify event" option. - Auto search contacts in title editor:
When this is turned on and you start typing a name in a new event's title, CalenGoo will automatically search this name in your contacts and if it finds matches, it will display a table to choose a contact from. The selected contact will be copied into the title, location and description fields of the event. This way you can quickly schedule a meeting with someone without adding him as attendee. - Auto search after number of characters:
Here you can specify after how many characters the "Auto search contacts" function should start to search. - Copy contact to title:
In the edit view there is a button in the toolbar at the bottom of the screen that allows you to insert a contact's data from the address book into an event. With this and the following switches you can specify which data from the contact should be copied into the event. When you turn "Copy contact to title" on, the firstname and lastname of the contact is copied into the title of the event. - Copy company name to title:
Copies the company name of the contact into the title of the event. - Copy contact to location:
The address of the contact is copied into the event's location field. - Phone&email description:
Copies the phone numbers and email addresses to the event's description field. - Birthday into description:
Copyies the birtday of the contact into the description field. - Create contact id link and Create contact name link:
These are two options to link a contact to an event by putting either its internal ID or its name into the description field. When such an event is viewed in the detail view, you will have additional buttons to open contacts that are linked this way directly with the iPhone/iPod's address book. - Auto move end time:
When you change the start time of an event and this switch is turned on, the end time is automatically moved by the same time difference to preserve the duration of the event. - Default privacy setting:
Every event can have a privacy setting that determines who should be able to see the details of the event. Here you can specify the default value for this setting. You can change it for each event individually in the event edit view. - Default availability setting:
Similar to "Default privacy setting" but for Google's availability field. - New events are 'Floating events':
Turns "Floating event" on by default for new events. Please see Floating Events. - Save into multiple calendars:
Allows you to specify additional calendars when creating or editing an event to save copies of the event into. - Auto skip date on keypad:
If you are using the keypad to enter times and do not want to tap the "skip" button all the time to skip entering the date, you can automatically skip it and if you want to enter the date, you can simply tap the "C" button to move the cursor to the start of the date field. - Keypad allows partial input:
If turned on, you can e.g. just type "09" instead of "09:00" to only change the hour of an event. - Keypad rounds to minute precision:
Specifies if the keypad should round the entered time to the configured minute precision or if it should just use the entered time. - Default reminder type:
Here you can configure the default type for new reminders, i.e. "Email", "SMS" or "Pop-up". - Editor font:
Here you can configure the font for the title, location and description editor. - Check for conflicting events:
If this is turned on, CalenGoo will check for overlapping events when saving an event and display a warning. - Conflicts with all-day events:
Determines if all-day events should be taken into account when checking for a conflict, i.e. if an all-day event on the same day is a conflict. - Conflicts with 'free' events:
Events can be marked as 'free' or 'busy'. This option specifies if events marked as 'free' should be taken into account when checking for conflicting events. - Calendars for checking conflicts:
Here you can specify which calendars should be searched for conflicting events.
Day view
- Day start time and Day end time:
You can limit the day view to only display a certain range of time, e.g. if you do not have any events during the night and do not want to accidentally scroll into this time range. - Event's Time:
You can configure the text color of the time here. - More than 4 all day events:
Enabling this feature will allow the header in the day view to display more than four all day events by letting them overlap the calendar. The will hover slightly transparent over the calendar view, but will not be touchable. - Title:
The color of the title text. - Today's background:
The background color of the current day, normally yellow like in Google Calendar. - Background of days:
The background color of the other days. - Weekend's background today:
The background color of the current day if it is a weekend day. - Background of weekend:
Weekend days can have a different background color, by default it is a light gray. - Background opacity:
Here you can specify the opacity of the event's background. - Header Weekday Background:
The background color of the header area for normal days. - Header Weekend Background:
The background color of the header area for weekend days. - Timeline background:
The background color of the timeline. - Timeline with centered times:
If turned on, the times will be moved a few pixels up to be centered to the line for the full hour. - Font Size:
The size of the font used to display the events in the day view. It also affects the visible time range. The default is "Standard" (100%). Additional options are "Large" (135%), "Larger" (166%) and "Very Large" (200%). - Row Size:
Normally one hour in the day view has a height of two rows of text. Here you can increase the height to 100%, 150%, 200% or 300%. - Show location:
When turned on, the location field of an event is displayed in the event box below the title, prefixed by an "@". - Show description:
When turned on, the description field of an event is displayed in the event box below the title. - Show titlebar for event:
Normally every event in the day view has a darker title bar. Here you can turn it off. - Show icons:
Specifies if icons should be displayed in the day view. Please see: Icons - Time of short events:
When turned off, the time of an event is not displayed if the event's duration is less than one hour to save space to display the event's title. - Show end time of 0 min events:
Events with a duration of 0 minutes have an identical start and end time. If this is turned off, only the start time will be displayed. - Singletap opens event:
Normally you have to double-tap an event to open it. When you turn this on, a single tap will be sufficient. - Create by tapping:
When this is turned on and you double-tap an empty area in the calendar or the time line on the left, a new event is created for the time you tapped. - Full screen width:
Normally one day does not fill the whole screen, you can always see a small part of the previous and/or next day. When you turn this on, one day will be as wide as the screen is. - Snap in:
When turned on, the day view will snap in on full days. Useful in combination with "Full screen width". - Day width (if not fullscreen):
If "Full screen width" is not turned on, you can change the width of a day here. - Snap in animated:
If turned on, the snap-in to the full day will be animated, which will take a little time but may look nicer. If turned off, it will immediately snap-in to the full day when you stop dragging. This way you can flick to other days very quickly. - Bounce vertically:
Determines if the vertical scrolling will just stop or if it will bounce back. - Large day number:
Shows the number of the day about twice as large as the month and weekday. It is turned on by default. - Week number:
Displays the current week number in the header. - Update immediately:
Shows new events immediately after they have been entered instead of first trying to upload them and displaying them afterwards. - Font:
The font used to display the events in the day view. - Show working time:
Displays working time in a different color from your free time color. - Working time start/end:
Defines the range of your work time. - Show sunrise/sunset:
CalenGoo can display the sunrise and sunset for your current location for each day in the calendar. - Color of sunrise line:
The color of the line that indicates the time for the sunrise or sunset. - Background of non working time:
The background color of your free time. - Background non work. today:
The background color of your free time for the current day. - Fixed time after startup:
When CalenGoo is started and displays the day view, it shows the current day and tries to move the current time to the top of the screen. If you do not like it, you can specify here which time should be move to the top of the screen. - Time after startup:
The time used when "Fixed time after startup" is turned on. - Indicate events above/below:
When events are above or below the currently visible area, this can be indicated in different way that you can specify here. - Header background gradient, event background gradient:
Settings to change the look of the day view. - All-day Font:
The font used for all-day events. - All-day list font:
The font that is used when opening the all-day events list by double tapping the header with the all-day events at the top of the day view. - Indication of unsaved events:
Normally events that could not be uploaded to Google yet, are displayed with a transparent background. Here you can change the look of those events. - Date in navigation bar:
Displays the currently displayed day's date in the navigation bar. - Fixed column for each calendar:
If you have resources to manage/rent, you can use this function to have fixed columns for each calendar. Then you can create one calendar for each resource and easily see when a resource is booked and when it is free. Please see the screenshot on the left. - Remove empty columns:
When "Fixed column for each calendar" is turned on, this option removes the empty columns. - Fade declined events:
Fades events depending on their tentative/declined state. - Border around unanswered events/Color of unanswered events' border:
Displays a colored border around events that you didn't answer yet (i.e. where you are an attendee with the status "No answer"). - Fade past events/Opacity past events:
Allows you to fade past events similar to Google Calendar. - Line every x minutes:
Normally there is only a line every 60 minutes, but you can configure it to 30 or 15 minutes. It might be useful to increase "Row Size" (see above) if setting it to 15 minutes. - Drag&drop snap in to x minutes:
Normally drag&drop snaps in to 30 minute intervals, but you can configure it to e.g. snap in to 15 minutes. - New events snap in to x minutes:
When adding a new event by double tapping a free space, it is aligned either to full hours or to x minutes steps as specified here.
Month view
- Vertical scrolling:
You can switch between a month view where you can see a whole month and can scroll horizontally, month-vise or a month view where you can see about five weeks and can scroll vertically, week-vise. - Background color:
The background color of normal days. - Today's background:
The background color of the current day, normally yellow like in Google Calendar. - Background of weekend:
The background color for weekends. - Line color:
The color of the grid lines. - Background gradient:
Turns the background gradient in the vertically scrolling month view on or off. - Date Font:
The font used to display the date. - Date color:
The color of the date numbers. - Today's date color:
The color of today's date number. - Font color:
The text color used to display the all day events. - Weekday name:
Shows a small weekday name beside every day number. - Week number:
When turned on, the week number is displayed in a small rectangle at the start of the week. - Weekn. in 1st col:
Shows the number of the week in the first column regardless on which day the week starts. - Hours in month view:
This gives you several options how you would like to see the time of your appointments in the month view. The options are
- Long, e.g. 9:00 am
- Short 12h am/pm, e.g. 9am
- Short 12h, e.g. 9
- Short 24h, e.g. 15
- None
- Short 24h Start/End, e.g. 14-16
- Short 12h Start/End, e.g. 9A-1P
- Short 12h[:mm] am/pm, e.g. 9A or 9:30A
- Short 24h[:mm], e.g. 15 or 15:30
- Short 12h[:mm], e.g. 3 or 3:30
- First day of week:
Lets you specify, where your week starts. - Font:
Here you can specify the size and kind of font you would like to use. - Max. font size:
When zooming into the month view, the font grows according to the current zoom level. With this function you can limit the maximum font size to see more of your event's title instead of getting a larger font. - Name of month twice:
When turned on the name of the month will not only be displayed in the header but also above the month calendar in the zoomable area. - Only events with icons:
When turned on, only events with an icon will be displayed. - Repeat title for multiday events:
An all-day event that spans multiple days is displayed as a continuous bar. The title can be repeated on the bar or it can be displayed only once. It may be useful to repeat it to be able to still see the title when zooming in to only a small part of the month calendar. - Compressed all-day events:
If you have a lot of all-day events, this switch can be used to display all-day events only with half the height of normal events. - Colored bars for all-day:
If this is turned on (which it is by default) then all-day events will be displayed with a colored background bar. - Colored bars for timed events:
If this is turned on (which is not turned on by default) then timed events will be displayed with a colored background bar. - Overnight events as bar:
Overnight events can be displayed as a bar like all-day events. - Show other month's days:
When using the horizontally scrollable month view, this can be used to hide the days of the previous and next month at the top/bottom of the screen. - Fade past events/Opacity past events:
Allows you to fade past events similar to Google Calendar. - Single tap opens day:
When this is turned on, you can tap on a day to open it in the day view.
- Font:
Specifies the font that is used in the agenda view. When you choose a font of size 15 or smaller, your agenda entries are displayed with two rows if necessary to display the full title. - Rows:
Lets you display more than one row of text for long event titles in one row of the agenda view. - Flexible row size:
This is useful is "Rows" is set to 2 or more rows. Then this option specifies if all rows have the same size or if they can be smaller if the event has a shorter title that doesn't need so many rows to display. - Prev./Next Buttons:
Displays buttons to load previous or next events at the start and end of the list. If you turn it off, it will automatically load further event when you reach the end of the list but this works only correctly if you have enough events in the list, i.e. if the list is long enough. - [+] button in headers:
Displays a "+" button in the header of each day to add an event to that day. - Show empty days:
Here you can specify if empty days should be omitted or if headlines should be displayed for empty days. - Show location:
Determines if the location of an event should be displayed. - Location font:
The font used to display the location in the agenda view. - Separator Color Today:
The color for the current day's header. - Fade past events:
If this is turned on, events from the past are displayed faded out, i.e. less colorful. - Today button skips past events:
If this is turned on, the today button will scroll the list to a position where past events are outside the screen and the current event is at the top of the screen. If there is no current event at that time, the next event is moved to the top of the screen. - Show end time:
You can decide if you would like to see the start and end time of an event or only the start time. - Hide time:
If you like you can completely hide the time and display only the title of the event. - Use 24:00 instead 00:00:
Instead of displaying 00:00 as end time for an event, 24:00 is displayed to make it more clear that the next day is meant. - Show 'all-day' label:
In the day view the start and end time of events is displayed on the left. For all-day events it displays "all-day". By turning this off you can leave that space blank for all-day events. - Show event status icons:
If turned on, a few small icons on the left side show if the event has a location or is a recurring event.
- From current day on:
Normally the week view displays a whole week, starting from Monday. When this is turned on, the week view displays a whole week always starting with the current week day. That means you can see the next six days from the current day. The current day is displayed at the top, two columns wide. The other six days are below in two columns, three rows. - Current day two columns:
When "From current day on" is turned on, the current day will be displayed two columns wide. With this option you can choose if you would like to display the events in two columns or instead have more space to display long titles (one column). - Header Font:
The font used to display the date for each day. - Header Font Color:
Specifies the color for the text in the header for each day. - Header Background:
Specifies the background color for the header rows. - Shorter date format:
If turned on, a shorter variant of the date format is used for the day headers. - Today's background:
The background color of the current day, normally yellow like in Google Calendar. - Weekend's background:
The background color of the weekend. - Font color:
The text color used to display the all day events. - Selected background:
The background color of the currently selected day (where new events would be created for). - Hours in week view:
Gives you the same configuration options as in the month view to change the way how the time is displayed for every event. - First day of week:
Because of the kind how the week view displays the week (with just a little space for Saturday and Sunday), the start of the week is normally set to Monday. However it is configurable. - Font:
Here you can specify the size and kind of font you would like to use. - Rotate day order:
Specifies if the days of the week are ordered in columns or rows. - Weekend in smaller boxes:
Specifies if the weekend days should be displayed in smaller boxes than the other days to save space. - Week number:
Displays the week number of the first displayed day in the header of the screen. - Colored bars for all-day:
Normally all-day events are displayed with a solid bar with the color of the event's calendar as background. Here you can turn this off, then they will be displayed with the default background and the event's calendar's color will be used for the text instead. - Colored bars for timed events:
If this is turned on (which is not turned on by default) then timed events will be displayed with a colored background bar. - Open on double tap:
Here you can choose which calendar view should be opened if you double tap one of the days in the week view. - Number of rows per entry:
Events can be displayed over multiple lines if they have a long title. Here you can set a limit, i.e. how many rows they can use. - Show location:
Determines if the location of an event should be displayed. - Fade past events/Opacity past events:
Allows you to fade past events similar to Google Calendar.
Landscape day view (week)
- Enable landscape day view:
This turns on a special kind of day view that will be displayed when you rotate the device to landscape mode. This landscape day view will show 5, 7, 14 or 21 days at a glance, helping you to find free hours in your week. - All-day events:
Specifies if all-day events should be displayed in the background of the landscape day view. - All-day events in background:
All-day events can be displayed as vertical bars in the background of each day to save space or they can be displayed in the separate bar at the top. - All-day events upwards:
Specifies the text direction (upwards or downwards) for the text of the vertically displayed all-day events. - From current day on:
Here you can specify if the view should start to display the week beginning with the current day. - Font:
Here you can specify the size and kind of font you would like to use. - Number of days:
Here you can specify if you want to see 7 days (a whole week) or 5 days (only the work days, Monday to Friday). - First day of week:
Specifies the day with which the week should start. Please keep in mind that the displayed week number is the week number of the first displayed day. - Day start time and day end time:
The landscape day view shows a certain part of the day at a glance. Here you can specify the start time and end time for that part. - Today's background:
The background color for the current day. - Weekend's background:
The background color for the weekend. - Week number:
When turned on, the number of the displayed week is displayed in the header. If more than one week is visible (because you changed the first day of the week), the week number of the first visible day is displayed. - Show workingtime:
As like as in the portrait day view you can highlight your workingtime with another background color. - Show sunrise/sunset:
CalenGoo can display the sunrise and sunset of your current location in the calendar. - Show events w/o duration:
If an event has a duration of 0 minutes, it is normally not displayed in this view. By turning this on, it will nevertheless be displayed. - Hours only in one column:
Normally the hours are displayed for every day. But especially when displaying 14 or 21 days, this can make the screen unclear. - Show location:
If turned on, the location is appended to the title of the event and is displayed this way. - Overlap events:
If turned off, the events will be displayed side-by-side, otherwise they will be displayed overlapping. - Fixed column for each calendar:
If you have resources to manage/rent, you can use this function to have fixed columns for each calendar. Then you can create one calendar for each resource and easily see when a resource is booked and when it is free. Please see the screenshot above in the description of the "day view". - Line every x minutes:
Shows a line every x minutes to make it easier to see when an event starts or end. - Drag&drop snap in to x minutes:
Specifies to which times events should be aligned when moved via drag&drop. - New events snap in to x minutes:
Here you can specify how new events that are created by double tapping a free space should be aligned. It is even possible to align them to previous events by choosing e.g. "45 min (align to previous events)" - Show calendar selection bar:
Specifies if the calendar selection bar should be displayed. - Smaller calendar selection bar:
Reduces the height of the calendar selection bar. - Hide navigation/tools bars:
Hides the navigation bar at the top and the tools bar at the bottom to get more space to display the landscape day view.
Year view
- Enable year view:
Here you can turn the year view on or off. This can be useful on the iPhone where the buttons for the different calendar views will otherwise get quite narrow. Please see here for a few screenshots: Year view - Calendars:
The year view can display events of your calendars. Here you can choose which calendars should be taken into account. - Show non all-day event:
Normally only days with all-day events are marked. If you turn this on, also days that have a timed event will be marked with the calendar's color. - Show other month's days:
Determines if the days of the previous and next month should be displayed. - Week number:
Determines if the week numbers should be displayed. - Font color:
The color for the headlines and week numbers. - Font color dates:
The color of the day numbers. - Background color:
The background color of the whole year view. - Background header current month:
The background color that is used to highlight the current month's name. - Border color today:
The current day will be marked with a border in this color. - Border color selection:
The selected day will be marked with a border in this color. Tap a day to select it. - Event opacity:
The opacity for the calendar colors.
Search view
- Search in descriptions:
Normally the search function only searches in the event's titles. This extends the search to include the descriptions. - Search in locations:
This extends the search to include the locations of the events. - Search in attendees lists:
Includes the email addresses of the attendees when performing the search. - Search in tasks:
Includes the tasks in the search. - Show recurring events:
When searching for events, normally only the first occurrence of a recurring event is displayed. If this is turned on, occurrences of the last and next two months of all found recurring events are additionally displayed but with a brighter color to be able to distinguish them from the normally found events. - Search in iPhone/iPod/iPad calendars:
Includes the built-in calendars of the iPhone/iPod in the search if "Show iPhone/iPod calendars" is turned on. Due to limitations of iOS, only the last two and next two months are used in the search (see next item). - Search range iPhone/iPod/iPad calendar:
Here you can specify the time range that should be used when searching the iPhone/iPod/iPad calendar. The larger the time range, the slower will be the search. - Sort reverse:
Reverses the sort order of the search results. - Max. results:
Here you can specify how many search results should be displayed (but may be more due to the expansion of recurring events). - Time range recurring events:
Here you can specify the time range for which recurring events should be displayed. This is limited because otherwise you would get an endless list of results if you have endless recurring events.
Tasks view
- Font and Notes Font:
Lets you specify the font used to display the tasks. - Show Index List:
If you have a lot of task lists, you can let CalenGoo display a shortcut bar on the right side of the tasks view that allows you to quickly jump to a certain task list. - Show overdue tasks on today:
When turned on, all uncompleted tasks from the past are additionally displayed on the current day. - Show overdue tasks also on due date:
When using "Show overdue tasks on today", the events are displayed on today and can be additionally displayed on their original due date. - Sort alphabetically in calendar views:
When tasks are displayed in the calendar views, they are usually displayed in the same order as "Sort (my order)" in the tasks view. When this switch is turned on, they are displayed alphabetically instead. - Immediate upload:
Specifies if changes to the tasks should be immediately uploaded (which is the default) or delayed until the next time you sync. - Edit notes fullscreen:
The notes of a tasks can be edited directly in the tasks view in a single line editor, or in a full screen editor. When using the single line editor, line feeds are removed. So if you use line feeds in your notes, you should use the fullscreen editor. - Create events using [+] button:
If this is turned on, the "+" button in the tasks view will allow you to create events and tasks. - Reminder default time:
Here you can specify the time that is set for new reminders. Because tasks do not have a time, it is not possible to use reminders e.g. "5 minutes before" like you can use them for the events. That's why it is necessary to specify a time. - Check recurring tasks during download:
If you have completed recurring tasks in Google Tasks instead of CalenGoo, CalenGoo can set the correct next due date and mark them as uncompleted during the next sync if this function is turned on. - Cancel button: (iPhone, iPod)
Displays a "Cancel" button in the tasks edit screen, so that you can cancel your changes. - Font color:
The font color for tasks in the tasks view. - Notes font color:
The color of task notes in the tasks view. - Font color completed:
The font color of completed tasks in the tasks view. - Font color overdue:
The font color of overdue tasks in the tasks view. - Background color:
The background color of the rows in the tasks view. - Checkbox color:
The color of the tasks' checkboxes. - Background bar (week/month):
If turned on, tasks are displayed with a colored background bar like all-day events in the week and month view. - [+] button in headers:
Shows a "+" button in the header of each list to add a new event directly to that list. Additionally you can tap the header to collapse/expand a list. Please see here for details: Tasks - Hide collapsed tasks in calendar views:
If activated, tasks that belong to a list that is collapsed in the tasks view, are not displayed in any of the calendar views (please see also "[+] button in headers" above). - Set due date to completion date:
If turned on, then the due date is set to the current date when you mark the task as completed (this can be useful if you complete a task after its due date).
Expert/Maintenance
You should normally not need these functions. They are only here for debugging purposes.
- Activate Debug Reports:
When turned on, a new button labeled "Report bug" will appear in the tool bar of the detail view, but only when it displays a recurring event with "Edit whole series". It allows you to send the recurrence rule by email. It is useful to debug events that are e.g. displayed on a wrong day. This should not happen normally, but in the past some events from other applications that were synced with Google Calendar used recurrence rules that CalenGoo did not understand correctly. All known problems have been fixed, but if such a problem occurs again, it is now easier and faster to fix it. - Ignore time zone changes:
CalenGoo can recognize when you move to another time zone. It will then allow you to ignore the time zone change or to adapt your events to the new time zone. This switch can be used to turn off this feature. It is normally not needed. - Optimizations for large calendars:
When turned on (which is also the default), CalenGoo won't load older recurring events on startup. It will load them later when they are necessary, e.g. when you scroll to an older part of your calendar. Normally you should leave this turned on, it should only make it faster. - Further speed optimizations:
Should be turned on, was only added to allow it to be turned off in case problems occur. - Calendar System:
Experimental support for additional calendaring systems like "buddhist", "chinese", "hebrew" and others that are available under iOS. - Advanced time zone support:
If you have different time zones in your calendars so that events can appear on a different day in the calendar due to the time zone difference, you should turn this function here on. It will make the app a little slower, but then those special time zone differences will be taken into account. - Template view opens folders fullscreen:
When opening a folder in the templates view, usually the whole screen is animated and you can use the button in the upper left corner to return to the previous folder. - Sync block size:
When CalenGoo downloads events from Google Calendar, it downloads them in blocks of the size configured here. The larger the blocks, the larger the download (in conjunction with "Use database transactions" (see below)). - Sync changes only for certain time range:
Normally CalenGoo downloads all events that were changed in Google Calendar since the last sync. Using this function you can limit this so that only recently changed events that are not too old are downloaded. - Cache for iOS calendars:
You can turn this on to speed up accessing the iOS calendar. Data that has been read once won't be read again until something changes in the iOS calendar. - Compute reminders/badges in background:
This can make saving events a lot faster. Usually the reminders and badge numbers are computed when saving and event. So it can take a few seconds to get back from the edit view to the calendar view. By turning this on these computations will be done in the background while you can already work with the calendar view again. - Use database transactions (improves sync speed):
Turning this on and setting "Sync block size" to "50" can increase the sync speed a lot, especially if many events have to be downloaded. - Recognize when a calendar has been cleaned:
Google Calendar supports a function to wipe a whole calendar. In that case CalenGoo is not informed about every single event that it has been deleted. Instead the whole calendar is marked as cleaned ("timesCleaned"). To support this function, i.e. to also make CalenGoo erase all events of that calendar in its own database in this situation, just turn this function on. - Skip unmodified task lists:
When syncing via OAuth2, this increases the speed of the sync by only syncing lists that are marked as modified. - Use OAuth2 font colors:
When syncing via OAuth2, CalenGoo can also received suggested font colors from Google for each calendar color. If you turn this function on, CalenGoo will use that font colors, which means it will use a black font in most cases. - Attachments always with Linked ID:
Usually attachments are linked to the ID of the event. However this ID can change if the event is moved into a different calendar. For this purpose a static linked ID can be saved into the description field of the event. This way it won't loose its connection to the attachments. Please also see: Attachments - Optimize database after sync:
Reduces the size and better organizes the data in the database after each sync. Should be turned on. - Optimize database option 1:
Some users had problems that CalenGoo froze for several seconds after each sync. Turning this on should fix it. Should be turned on also if you don’t have this problem and will probably be turned on by default in the near future. - Use SyncToken:
To find out which events have to be downloaded during a sync CalenGoo there are to options: If "Use SyncToken" is turned off then CalenGoo will ask Google to send all events that have changed since the time and date of the previous sync. If "Use SyncToken" is turned on, then it will get a "SyncToken" with each sync and send that "SyncToken" back to Google on the next sync so that Google knows which events to send. - Use new visibility/download screen and Use new calendar edit screen:
Uses new variants of these screens with additional features. The switches are here so that one can switch back if problems with the new screens occur. - Max. days for reminders:
Here you can configure how many days in advance a reminder can be displayed. E.g. if you set it to "14", CalenGoo will only display reminders for the next 14 days. If you would create an event with a pop-up reminder "18 days" before the event, it would not be displayed. If you increase the number here computing the reminders will take slightly longer because then CalenGoo has to load more days to find the next upcoming reminder. - Backup deleted calendars:
When a calendar is deleted in Google Calendar and you sync CalenGoo, CalenGoo has to remove that calendar from its own database, too (otherwise it wouldn’t be synced, it would have a calendar that Google Calendar doesn’t have). As a security precaution a backup of that calendar can be created before it is removed. You can find the backup under "Settings > Backup" in CalenGoo. - Improved location detection:
If you use the natural language parser and this option is turned on, you can say or write "Meeting with John at restaurant" and CalenGoo will set the location of the event to "restaurant". It understands the words "at" and "in". - iOS10 reminder workaround:
This option prevents crashes under iOS 10 when you have many reminders. Unfortunately there is a bug in iOS 10 that can cause the reminder part of iOS to crash under certain circumstances and such a crash looks as if CalenGoo would have crashed. - Quick sync:
Google Calendar supports push, i.e. it can inform a server when a certain calendar has changed. However the server does not have access to the user’s data, it knows only that a certain calendar contains new information that CalenGoo should download. When turning "Quick sync" on, CalenGoo will tell Google Calendar to send such push notifications to a CalenGoo server. The advantage is that afterward CalenGoo can check with a single request which of your calendars contain changes instead of running one request for each calendar. Especially if you have many calendars this makes a huge difference. Please be aware that the first sync is slower because CalenGoo has to configure the "Quick sync" in Google Calendar. Subsequent syncs should then be faster. - Background sync:
When this is turned on, CalenGoo will try to sync from time to time in the background but it depends on iOS if CalenGoo is started for this purpose. - Workaround comment section detail view:
Should be turned on. It was only added as a switch to allow turning it off if problems occur.